Ultimate Mount Rainier 2-Day Itinerary & Hiking Guide
The Mobile Homie contains affiliate links and is a participant in the Amazon Services LLC Associates Program, as well as other affiliate programs. If you click on a link or make a purchase through one of these links, we may earn a small commission at no extra cost to you. For more details, see our Privacy Policy.
If you only have a weekend to spend at Mount Rainier, don’t worry. You can see the best of it in just two days! We know how fast a trip can fly by, especially when time off is limited, so this guide is made for travelers who want big adventure on a reasonable budget and a tight schedule.
This Mount Rainier 2 day itinerary covers must-see sunrise viewpoints, standout hikes, and local tips that won’t drain your wallet. We’ve explored the park twice (once in spring and once in summer) and packed this guide with what we’ve learned from both seasons. You’ll find easy-to-follow plans that squeeze in the wow moments without forcing you to rush or miss your morning coffee. Whether you’re heading out solo, bringing a friend, or planning a last-minute getaway, your stress-free Rainier weekend starts here!
Essential Planning: How to Get the Most Out of Your Mount Rainier 2 Day Itinerary
You only get two days. That means every hour at Mount Rainier should count (and trust me, they can count for a lot if you plan ahead). Whether you’re rolling into the park after work on a Friday or road-tripping from Seattle before dawn, a little pre-trip homework can honestly save you time, money, and stress. Here’s what you need to know before starting your Mount Rainier 2 day itinerary.
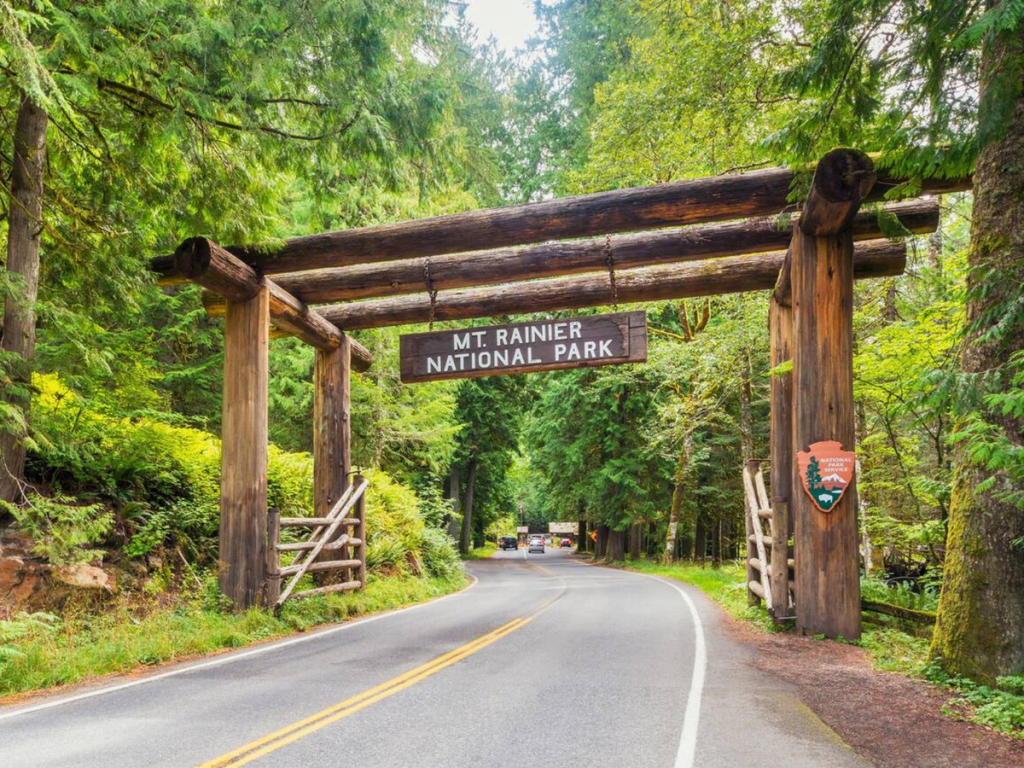
Entry Logistics and Park Passes
Let’s talk about getting through the gate. Everyone needs a Mount Rainier National Park entrance pass, even if you’re just passing through. We recommend buying your pass online or buying your National Park Pass ahead of time.
Pass options include:
- Standard vehicle pass – valid for 7 days and perfect for a weekend trip
- America the Beautiful pass – a great value if you’re visiting other national parks this year
- Motorcycle pass – lower cost, but only for bikes
Be sure to bring your confirmation email or physical pass, as rangers do check during peak season.
Important: If you’re visiting the Sunrise Corridor through the White River Entrance, you’ll also need a timed entry reservations between 7 a.m. and 5 p.m.
- Required daily from July 11 to September 1
- Required on weekends and holidays only from September 2 through mid-October
Tip: Arrive before 8 a.m. or after 6 p.m. to avoid lines at the Nisqually or White River entrances and enjoy a quieter start to your day.
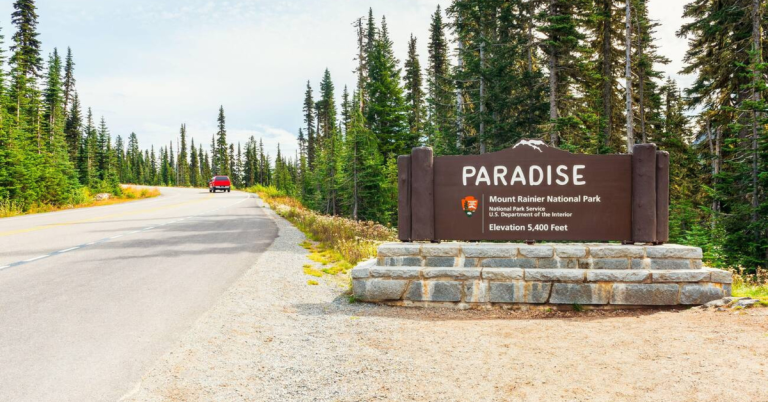
Where to Stay Without Breaking the Bank
Finding a comfy place to crash without emptying your wallet is easier than you think. Mount Rainier doesn’t have a ton of hotels inside the park, so most budget travelers sleep just outside its borders.
Here’s a quick breakdown of your best options:
- Camping in the park: Reserve campsites early at Cougar Rock or White River campgrounds. Sites open for reservations 6 months in advance, and go very fast!
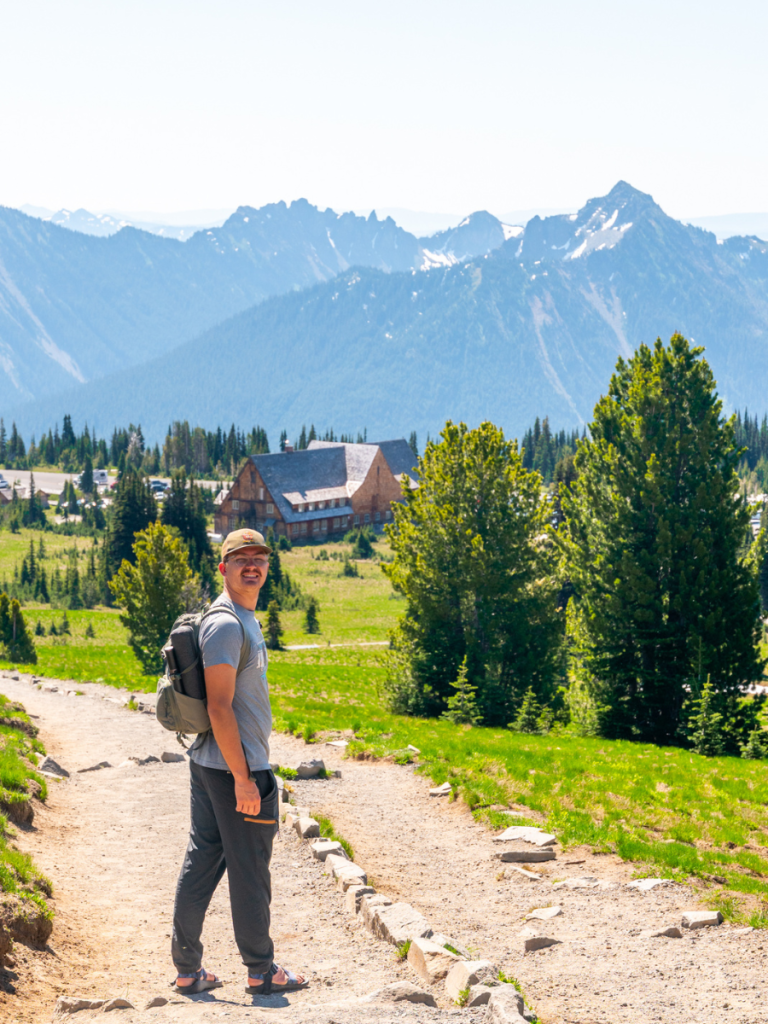
- Inns and cabins: Check nearby towns like Ashford, Packwood, and Enumclaw. Paradise Inn is fabulous, but fills up fast!
- Hostels/Airbnbs: A handful of options pop up in surrounding small towns, especially in Ashford, WA!
If you’re into camping and okay with roughing it, National Forest camping just outside the park is free in many spots, but with zero facilities.
Weather, Packing, and Gear Prep
Mount Rainier’s weather is famous for mood swings. June brings wildflowers, while August is drier and packed with hikers. The sky can flip from blue to gray in minutes, so make sure to always layer up.
Essentials for your bag:
- A warm jacket (yep, even in July and August)
- Waterproof shell or raincoat
- Hat and gloves for chilly mornings
- Good hiking boots
- Daypack with water, snacks, and sunscreen
- Flashlight or headlamp (for early starts or evening drives)
- Park map (cell service fades fast in the mountains)
- Portable charger for phones and cameras
Both times we visited, the weather was fairly nice, but no matter the temperature during the day, you can count on it getting chilly at night.
Best Time for a Mount Rainier 2 Day Itinerary
So, when should you make your Mount Rainier escape? July through mid-September gives you the most reliable weather, clear trails, and wildflower blooms, plus the longest daylight hours to fit everything into your 2 day itinerary. June can be great for fewer crowds, but snow may linger on higher trails and early sunrises are chilly.
- Pros of weekends: Ranger-led programs, food trucks in nearby towns, and popular spots like Paradise and Sunrise feel lively.
- Cons of weekends: Heavy parking lot competition, longer lines at entrances, and pricier accommodations (unless you snag a campsite early).
Want quiet trails? Visiting on a Thursday and Friday or late Sunday will change the vibe completely. But, since most of us only have weekends, we would definitely recommend getting up early!
Quick Pre-Trip Checklist for Stress-Free Adventures
Before you hit the road, double-check these must-do’s to set yourself up for two days of epic views and zero drama:
- Reserve your campsite or motel far ahead, especially for weekends.
- Buy your National Park pass/timed entry reservations before you get to the park.
- Pack smart layers and rain gear.
- Download offline maps or pick up a trail map at the entrance.
- Tell a friend your route if hiking alone.
- Top off your gas tank before entering the park.
It might feel like a lot of prep, but knocking out these basics means you’ll spend more time soaking up the mountain views and less time scrambling for cell service or warm socks. Your Mount Rainier 2 day itinerary starts here!
Day 1: Sunrise Area with Epic Views and Iconic Hikes
Waking up at Mount Rainier National Park never disappoints, but catching sunrise from the Sunrise area? That’s the kind of moment that will never disappoint! Day one of your Mount Rainier 2 day itinerary focuses on soaking up early light, crossing off the top hikes in the park, and squeezing in all the “wow” views you came here for.
Best Sunrise Spots and Early Morning Photography
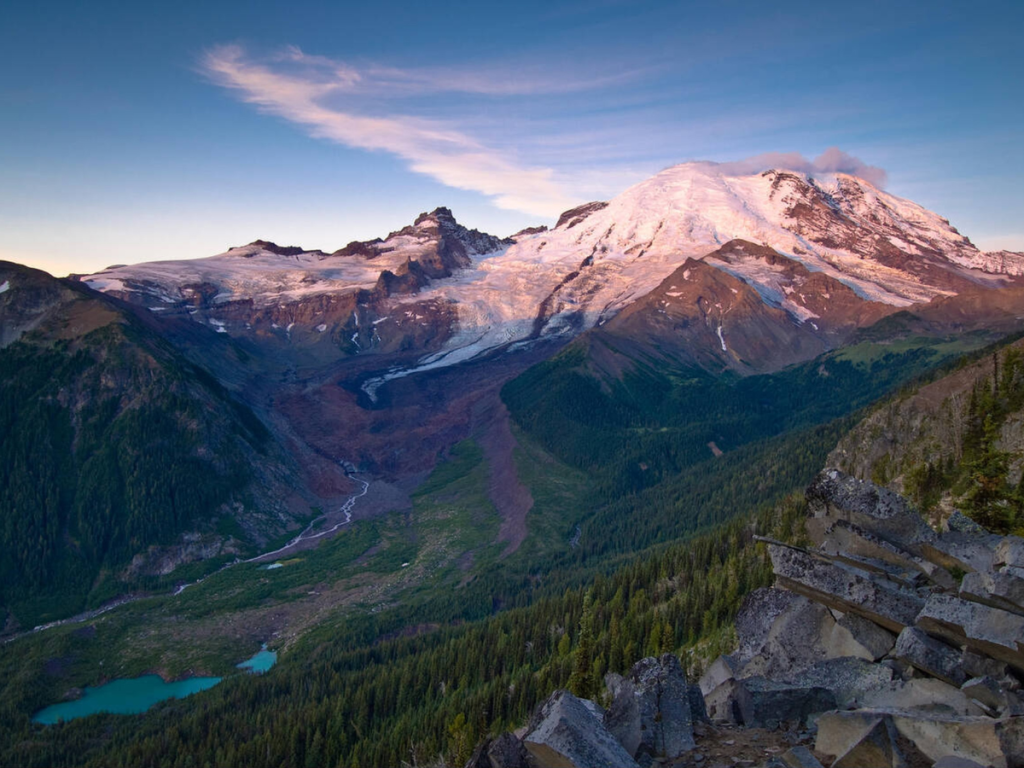
If you want front-row seats to magic hour, the Sunrise area is where you should be. Aptly named, this region catches the first golden rays on the mountain’s icy summit.
Where should you stand for the best experience?
- Sunrise Visitor Center parking lot: Pull in pre-dawn, climb the short path behind the center, and look west. The view is big, clear, and frames all 14,411 feet of Mount Rainier!
- Sourdough Ridge Trailhead: Just north of the visitor center, this spot is flatter and sees fewer crowds. The path delivers great angles with wildflower fields during late summer.
- Emmons Vista Overlook: Ten to fifteen minutes of gentle walking puts you at a high perch, perfectly lined up with the Emmons Glacier and valley far below.
Why show up early?
- Pros: You’ll beat crowds, snag the best photos before haze sets in, and have a good chance at seeing some wildlife!
- Cons: It means a very early alarm, but let’s be real — when isn’t an early wake up worth it?
Be sure to bring:
- A reliable headlamp (those parking lots are pitch black at 5 a.m.)
- Layers…you’ll start cold, then warm up fast as you hit the trails
If photography is your thing, the morning at sunrise mount rainier national park is unbeatable. Bring a tripod for long exposures and watch fog slide through the valleys while Rainier’s peak turns gold and pink. We’ve seen a lot of sunrises, but we both agree that Mt. Rainier had one of our favorites.
Top Hikes in the Sunrise Area: Trail Guide & Difficulty
Day one of your Mount Rainier 2 day itinerary wouldn’t be complete without some serious hiking. The Sunrise region is packed with trails offering wild open ridgelines, panoramic glacier views, and a real sense of space.
Here are the area’s best hikes! Each has something completely different to offer.
1. Sunrise Rim Trail
- Distance: 5.5 miles (loop)
- Time: 2.5 to 4 hours, depending on stops
- Difficulty: Moderate (steady climbs, some rock underfoot)
- Highlights: Unobstructed mountain panoramas, dramatic drop-offs, wildflower meadows in July and August
This trail is a quick hit of everything you came for. The path forms a loop, tracing Sourdough Ridge before swinging out to spectacular Emmons Vista. You’ll pass subalpine meadows, plenty of wildlife, and open slopes that feel otherworldly as morning fog lifts.
2. Mount Fremont Lookout Trail
- Distance: 5.6 miles (out and back)
- Time: 3 to 4 hours
- Difficulty: Moderate (some narrow, rocky sections)
- Highlights: Century-old fire lookout, huge Rainier views, possible mountain goat sightings
This is the classic lookout hike. The last mile follows a narrow ridgeline toward a solitary stone lookout, where you can rest on the deck and soak up endless views stretching across the Cascades.
Note: access to this trail can depend on season and weather, so check before you go!
3. Emmons Vista Trail
- Distance: 1 mile (round trip)
- Time: 30 minutes to 1 hour
- Difficulty: Easy (gentle grade, perfect for families)
- Highlights: Direct vistas of Rainier, Emmons Glacier, interpretive signs
Short on time or energy? This quick wander lets you score big mountain views with minimal effort. Great as a warm-up before breakfast or a calming wrap-up to your morning photo session.
Trail Tips and Lunch Ideas
Hiking in the Sunrise area of Mount Rainier National Park isn’t just about reaching summits. It’s about soaking up the views, maximizing your time, and keeping things affordable.
Here’s how to set yourself up for a great day:
- Arrive early. Plan to get to the Sunrise parking lot by 5 or 5:30 a.m. on summer weekends. The lot fills up fast, and sunrise won’t wait.
- Pack your own food and drinks.
- Use the restrooms at the visitor center before you hit the trail.
After you eat, make sure to pack out all food scraps and trash to follow Leave No Trace principles and help protect the wildlife!
This area truly delivers for early risers. Set aside this day to catch unforgettable morning light, experience some of the best hikes in Mount Rainier National Park, and start your weekend with a view that’s hard to beat.
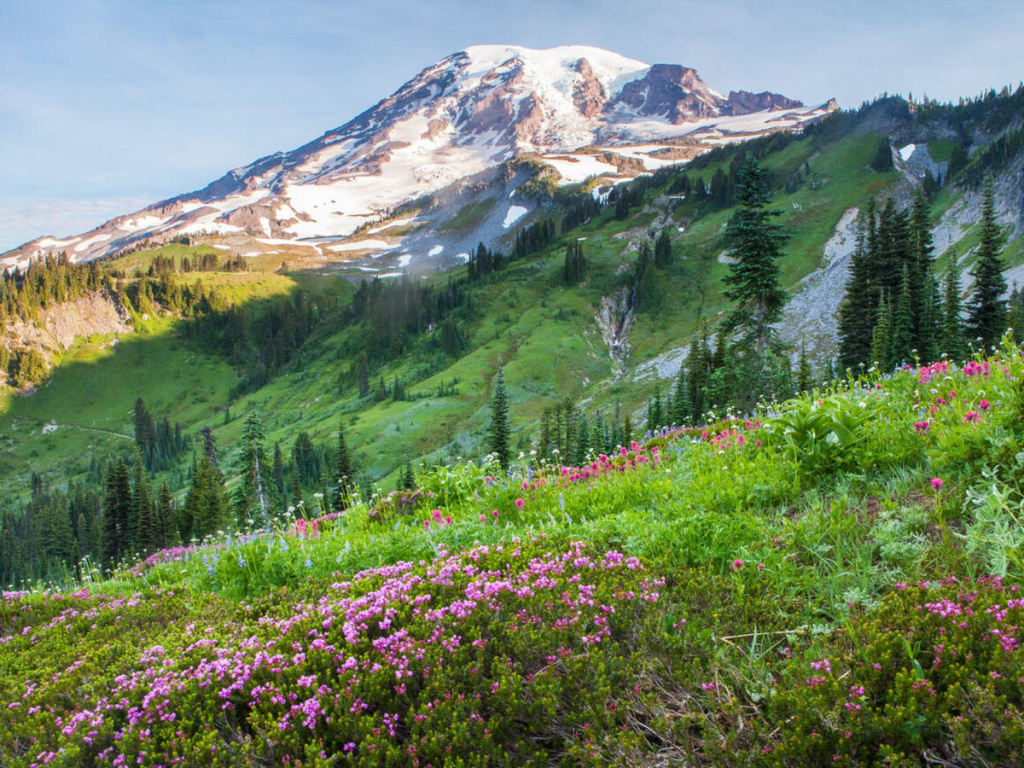
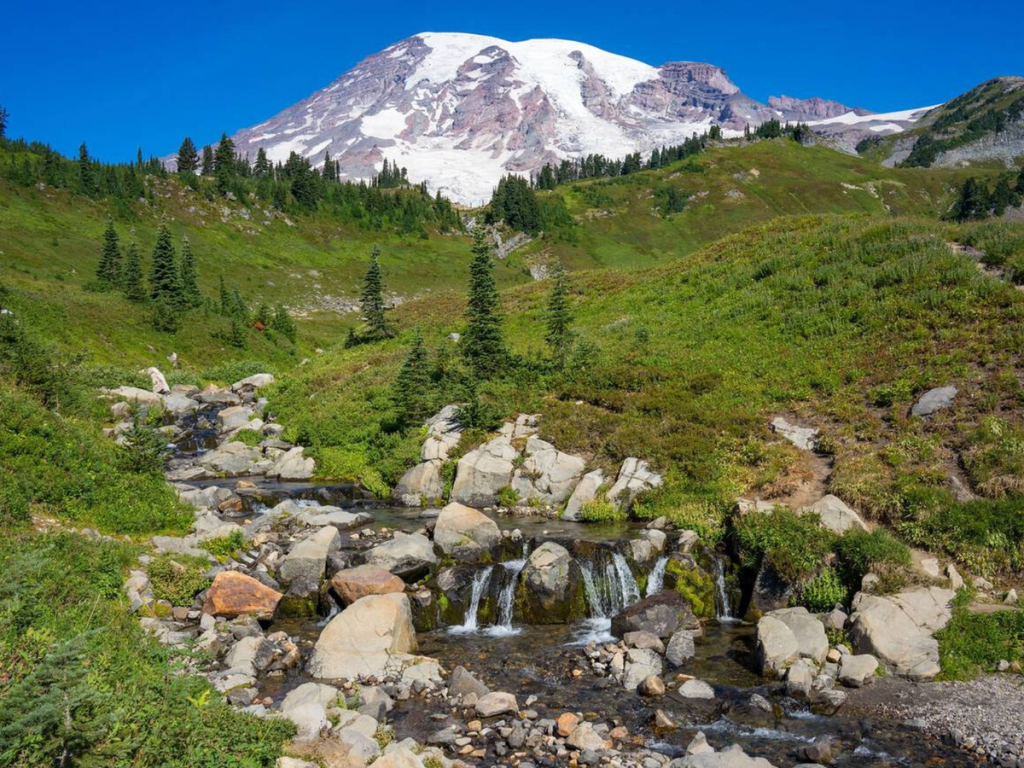
Day 2: Paradise Area with Wildflowers, Waterfalls, and the Skyline Trail
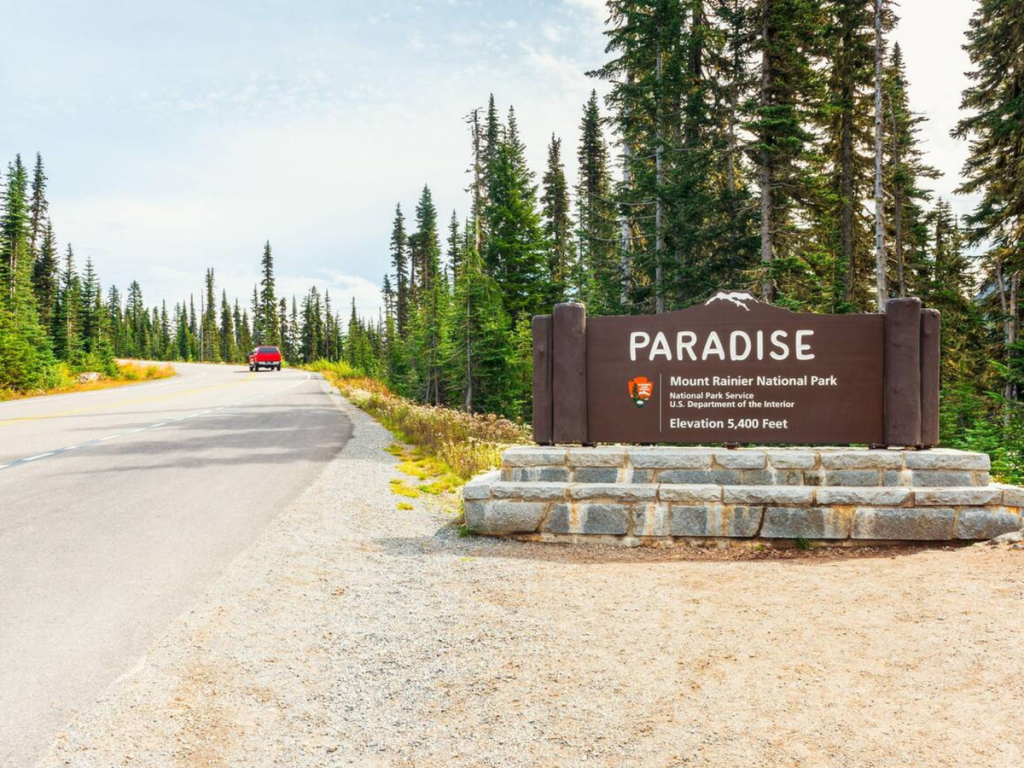
Paradise takes center stage on day two of your Mount Rainier 2 day itinerary. This part of the park packs in views that seem almost too good to be true.
Best Hikes in Paradise: Skyline Trail & Beyond
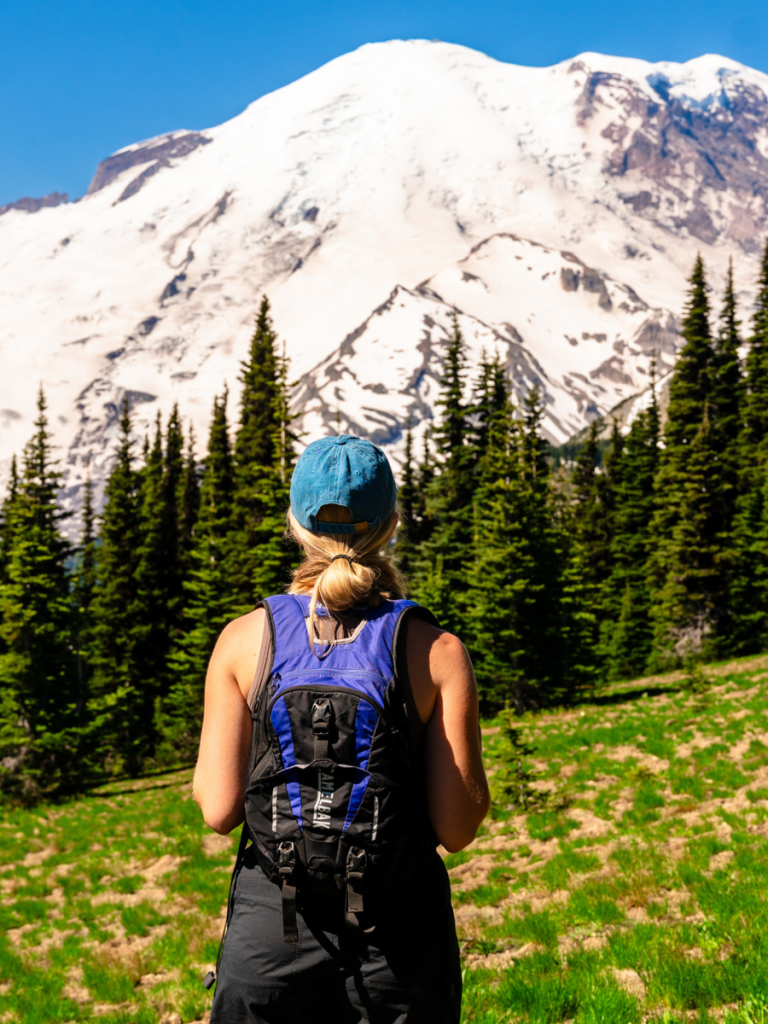
The Skyline Trail is the crown jewel of Mt. Rainier Paradise hikes. It’s a loop, about 5.5 miles long, with almost every kind of scenery you could hope for: meadows, volcano views, waterfalls, and wildlife sightings if you keep your eyes open. The climb is steady but not brutal, wrapping its way past small snowfields, over wooden bridges, and through vibrant blooms if you’re here during July or August.
The Paradise parking lot can fill by 9 a.m. on busy weekends. Aim to arrive by 7:30 if you want a parking spot without circling. Make sure to bring your own breakfast and coffee to sip before you start your hike. There are picnic tables and even a few quiet benches by the visitor center!
Skyline Trail magic:
- The section up to Glacier Vista has you face-to-face with Rainier’s glaciers and, if you’re lucky, marmots nibbling trail-side flowers.
- At Panorama Point, you’ll truly get the name! On clear days, you can spot Mount Adams, Mount St. Helens, and even Mount Hood way to the south.
Other Mt. Rainier Paradise hikes for all abilities:
- Myrtle Falls Trail: A paved, 0.8-mile round trip from the visitor center to a charming waterfall framed by Rainier.
- Nisqually Vista Trail: Another short gem. About 1.3 miles round trip, mostly flat, delivering big views over the Nisqually Glacier and easy wildflower spotting. Great for families or anyone easing into hiking.
- Golden Gate Trail: Shoot up this short, steep path (1.5 miles) to connect with the Skyline Trail loop.
Even on a tight schedule, the Skyline Trail Mt Rainier National Park delivers a true “best of” experience without needing advanced skills or gear. It’s perfect for squeezing the most beauty from a short trip.
Other Highlights in Paradise
Paradise is about more than just hiking. Waterfalls, wildlife, and wildflowers create the real magic here, turning every walk or drive into an adventure!

Waterfalls you shouldn’t miss:
- Myrtle Falls: Right off the Skyline loop, just 0.4 miles from Paradise Inn. Cross a charming footbridge to see the 72-foot cascade drop with Rainier towering behind.
- Narada Falls: Five minutes by car from Paradise on the way down towards Longmire. Park in the lot and follow a short, sometimes misty trail to the overlook. The spray cools you off on hot afternoons!
Best Viewpoints:
Some pullouts and stops stand out if you want the best views of Mount Rainier!
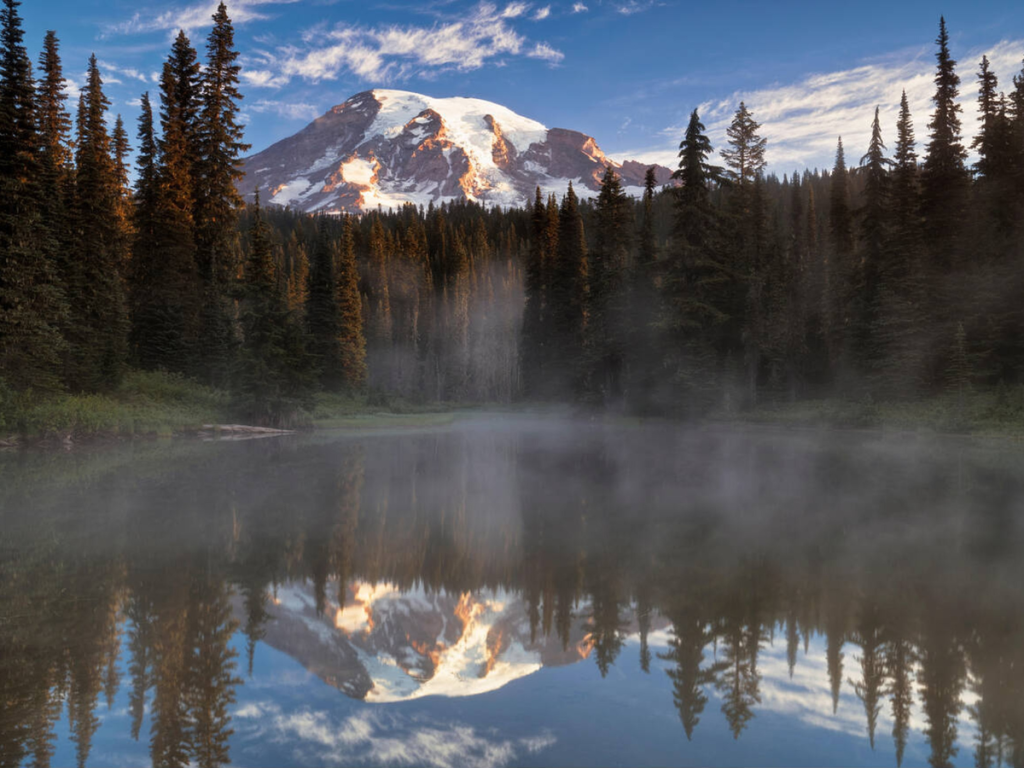
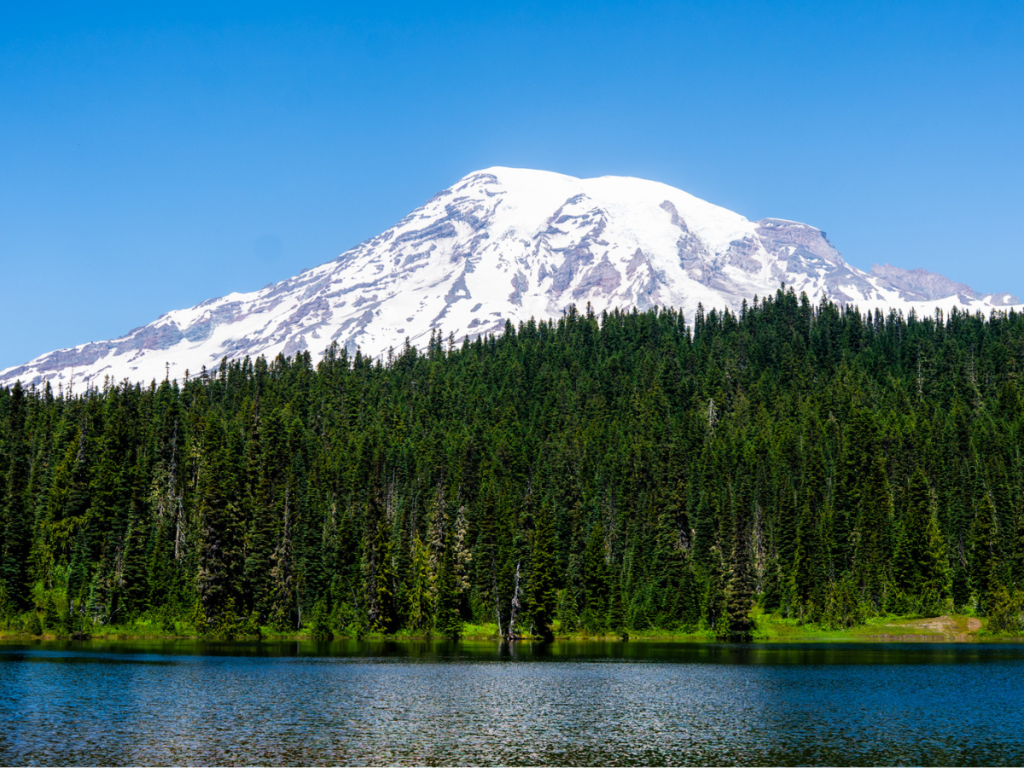
- Reflection Lake: It’s ten minutes from Paradise by car, just off Stevens Canyon Road. On calm mornings (usually before 8 a.m.), you’ll see Rainier mirrored perfectly in the water, especially in late July when wildflowers rim the lake. Seriously one of the best views of Mount Rainier that you can get! Easy access, no hiking needed, but arrive early to find parking close by.
- Paradise Meadows: Right beside the main lot, these meadows offer endless backdrops with layered wildflowers. Walk a little past the crowds for your own slice of scenery.
Paradise parking tips:
- Arrive early (by 8 a.m. on weekends) or visit in the late afternoon when crowds leave.
- Consider using the Longmire lot (about 20 minutes away) if Paradise is packed, then drive back for sunset photos when spaces open up.
Drive times for planning:
- Sunrise to Paradise takes about 2 hours if you drive straight, but the scenery makes it fly by. Plan to leave Sunrise by 6:30 a.m. for a full Paradise day or hit the road earlier if you want the best light.
- If you’re coming up from Ashford, WA, expect 40 to 60 minutes depending on traffic and stops for coffee.
The Paradise area is packed with easy-access must-sees and cozy corners that let you slow down and breathe in the best of Rainier. Every trail, waterfall, and viewpoint is proof you don’t need days and days to make a real connection here. This is the heart of your Mount Rainier 2 day itinerary, so take it all in and don’t rush.
Final Thoughts
You really can soak up the full magic of Mount Rainier National Park in just a weekend if you plan smart. This Mount Rainier 2 day itinerary balances sunrise glow at Sunrise, wildflower meadows and waterfalls at Paradise, and a stack of the best hikes you’ll remember every time you see a mountain.
Every stop on this route, from those early morning photo ops to the last Skyline Trail loop, brings you front and center with what makes Rainier so special. With a few tips in your pocket, you can skip the overwhelm and dive straight into the adventure.
We’d love to hear what worked for you! Drop your experiences or tips in the comments and help the next traveler dream up their own perfect Rainier weekend.
Plus, if you’re looking for a longer stay in the Pacific Northwest, check out our 7-Day Pacific Northwest Road Trip Itinerary!